
A few months ago, we got a call from a homeowner in Atascocita who had attempted a DIY garage door replacement. He had a decent set of tools but lacked key safety equipment and underestimated the complexity of replacing garage door, particularly when dealing with torsion springs and alignment issues. As a result, the bottom panel cracked, the flag brackets were bent, and the garage door opener was completely out of sync. At Alpine Garage Doors Texas, we stepped in to correct the issues, and it became a case study in why the right tools and knowledge are essential for a successful garage door installation or replacement.
Here’s the reality: The average residential garage door weighs between 130 and 350 pounds. That’s a massive structure hanging from your ceiling with tightly wound torsion springs and tension-loaded cables. According to the National Electronic Injury Surveillance System (NEISS), tens of thousands of injuries occur annually due to garage door mishandling. And many of these happen during garage door replacement or repair attempts without the right tools or understanding of the system’s mechanics.
Thinking of replacing a garage door yourself? While a DIY garage door installation can be a cost-saving venture, it requires a significant understanding of door mechanics, insulation values (R-values), cable tension, and the correct use of specialized garage door tools. In this comprehensive guide, we’ll walk you through everything you need for a safe, effective, and energy-efficient garage door replacement.
Why the Right Tools Matter When Replacing a Garage Door
Garage doors are engineered systems composed of panels, hinges, brackets, rollers, springs, tracks, and openers. Each component plays a vital role in the door’s smooth operation, safety, and energy efficiency. The success of your installation process hinges not just on effort but precision, which depends heavily on using the necessary tools.
For example, misaligned vertical tracks or improperly tensioned torsion springs can cause loud noises, uneven lifting, or total door failure. Using the correct tools ensures each part, such as the torsion tube, flag brackets, and center bracket, is properly secured, aligned, and functions as part of a cohesive system.
Safety Gear: Start with Protection Before the Process
Replacing a garage door isn’t just a home improvement project it’s an exercise in safety and precision. Before dealing with any spring or panel, suit up with the following:
- Safety Glasses: Essential when drilling, cutting, or working near torsion springs to protect from debris or accidental spring recoil.
- Heavy-Duty Gloves: Protect your hands from sharp metal edges, bolts, and cable ends during panel handling or tensioning.
- Vise Grip or Locking Pliers: Used to hold torsion rods or secure cables while adjusting spring tension or removing garage door sections.
- Steel-Toe Boots: Accidental drops of panels or heavy tools can cause foot injuries. Don’t risk it.
- Hard Hat: Highly recommended if working under a loaded spring system or during overhead panel installation.


👉 Always disconnect the garage door opener and lock the garage door in place with C-clamps before starting the replacement process.
Winding Bars: A Must for Torsion Spring Adjustments
One of the most dangerous steps in replacing a garage door is handling the garage door springs, particularly torsion springs. These springs are mounted above the door opening on a torsion tube and help lift the weight of the door during operation.
You’ll need:
- 18–24 inch Winding Bars: Designed to safely wind and unwind torsion springs. Two are needed for controlled movement.
- Never substitute with screwdrivers or makeshift rods. Using the wrong tool here is extremely risky.
💡 Springs must be wound clockwise or counterclockwise depending on their position (left-hand vs. right-hand wound).
Socket Set and Ratchet: The Heart of Every Door Installation
Garage door systems use a wide variety of bolts, nuts, and lag screws, which connect everything from hinges to horizontal tracks. A full socket and ratchet set with metric and SAE sizes is crucial for:
- Removing the old garage door brackets and hardware.
- Installing flag brackets and track supports.
- Adjusting roller brackets and hinge fasteners.
A torque wrench attachment is ideal to ensure bolts are tightened to manufacturer-recommended specs, especially for the center bracket and bearing plates that support torsion springs.
Wrenches: When You Need Control in Tight Spaces
When a ratchet can’t reach or precision is key, combination and adjustable wrenches are lifesavers. Use them to:
- Secure header brackets above the garage door opening.
- Loosen or tighten track bolts without stripping.
- Adjust the vertical track position for proper door alignment.
🔧 Choose chrome-vanadium steel wrenches for maximum durability during the installation process.
Cordless Power Drill: The Backbone of Garage Door Replacement
Fastening new hinges, brackets, and horizontal tracks can take hours with a hand screwdriver. Enter the cordless power drill, your best friend for:
- Installing metal track brackets into garage walls or ceilings.
- Drilling pilot holes into studs before mounting supports.
- Driving lag bolts into the framing or the header area.
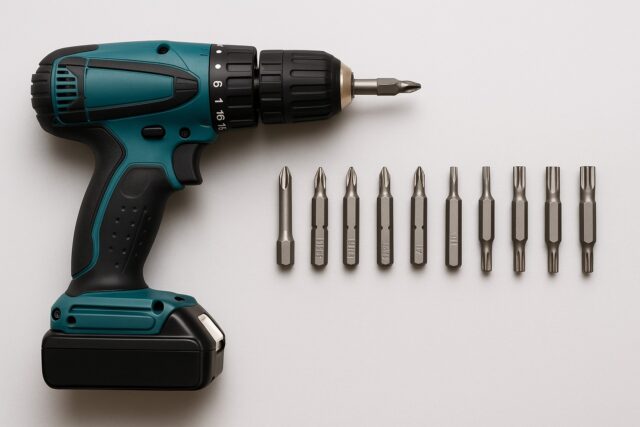
Make sure to use metal drill bits and have a set of nut driver attachments ready for hex-head screws common in garage door hardware.
C-Clamps and Locking Pliers: Safety and Stability Helpers
During a replacement, garage door panels and tracks must remain in place during adjustments. C-clamps and locking pliers help you:
- Prevent the door from rolling down while working on the opener or spring system.
- Hold vertical tracks or horizontal tracks in position during the tightening process.
- Lock cables or torsion tube rods during spring installation.
These small tools play a big role in ensuring your garage door installation proceeds without unexpected movements.
Level and Measuring Tape: Ensuring Smooth Operation
Poor alignment equals poor operation. A 4-foot level ensures that:
- Your vertical track is plumb, and your horizontal track is perfectly aligned with the ceiling.
- The door sits evenly across the garage floor for proper sealing and insulation.
Measuring tape is crucial for:
- Ensuring correct track placement and panel spacing.
- Aligning torsion spring components, such as the end bearing plates and center bracket.
Screwdrivers: The Detail Work Tools
Flathead and Phillips screwdrivers are needed for:
- Adjusting garage door opener terminals.
- Removing old weatherstripping or sensor brackets.
- Fine-tune limit switches on the opener for proper operation.
Tip: Magnetic-tipped drivers help retrieve dropped screws in tight spots.
Pry Bar or Crowbar: Carefully Remove and Adjust Components
Removing old garage door panels or shifting a misaligned bracket? A pry bar or flat bar is your go-to:
- Gently lift the bottom panel from the guide track.
- Remove trim or insulation around the garage door frame.
- Nudge panels into alignment without damaging metal or composite materials.
Step Ladder or Scaffolding: Access the Top Section Safely
Garage doors can reach over 8 feet in height, and accessing the top section, torsion springs, and header brackets is impossible without the right height tool.
- A 6-foot ladder is ideal for single-car residential garage doors.
- Scaffolding or an adjustable ladder helps for double-wide or commercial installations.
Never balance on furniture or makeshift platforms—safety first.
Torque Wrench: Accurate Bolt Tensioning
Incorrectly torqued bolts can lead to malfunction, especially on hinges, spring supports, and brackets. A torque wrench ensures:
- Bolts are neither under-tightened (which leads to loosening) nor over-tightened (which can strip threads).
- Safe operation of the garage door, especially at high-tension points like the center support bracket.
Hammer and Rubber Mallet: Tap, Don’t Slam
- Claw Hammer: Remove nails, tap wood trim, or dislodge damaged brackets.
- Rubber Mallet: Tap panels into place, align rollers, or gently reposition brackets without scratching.
Optional: Cable Tension Gauge
For the DIYer aiming for perfection, a cable tension gauge lets you:
- Equalize tension on both sides of the lift cable.
- Prevent leaning doors or uneven garage door openings.
This helps optimize garage door balance and prolong the lifespan of your system.
Extra Supplies: The Little Things Add Up
Have these handy before you begin:
- Garage door lubricant for rollers, tracks, and hinges.
- Weatherstripping and insulation kits for energy-efficient sealing.
- Replacement garage door panels (especially the bottom panel) if upgrading aesthetics or if damaged.
- New garage door opener if upgrading from a chain to a quieter belt-drive system.
What to Avoid as a DIYer
Even with the best tools, some tasks are just too risky:
- Torsion spring replacement without training.
- Full opener rewiring or logic board repairs.
- Track realignment on older, warped garage walls.
At that point, call a professional garage door technician to complete the process safely and efficiently.
How Can Alpine Garage Doors Texas Help You?
At Alpine Garage Doors Texas, we understand the garage door installation process inside and out. From selecting the right garage door panels to ensuring insulation and proper cable tension, we bring years of expertise to your doorstep.
Whether you’re halfway through a DIY attempt or ready to upgrade your door with a new energy-efficient model, our team is here for you.
- Residential or commercial garage doors
- New garage door opener installation
- Garage door repair and panel replacement
- Torsion spring maintenance and cable adjustments
📍 Visit Us: 638 Saddle Rock Dr, Houston, TX 77037
📞 Call Us Today: 346-438-1138
Let us take the hassle and risk out of your next garage door project so you can enjoy peace of mind, safety, and curb appeal.
Frequently Asked Questions (FAQs)
1. How long does it take to replace a garage door by yourself?
On average, a DIY garage door replacement can take 6 to 12 hours, depending on your experience and the complexity of the door system.
2. Do I need to get a permit to replace my garage door?
In many areas, yes, a permit may be required for garage door replacement to comply with local building codes, especially if structural changes are involved.
3. Can I reuse my old garage door tracks for a new door?
Usually, most new garage doors come with tracks specifically designed to match their panel weight and design, and using old tracks can affect performance and safety.
4. How do I know if my torsion springs are the correct size?
You’ll need to measure the inside diameter, wire size, and length of the spring or consult a garage door professional to ensure proper balance and tension.